While looking for a way to save costs on 3D models printed through Shapeway's laser sintering SWF-material type, I came across a very easy to use tutorial that uses the (free) Autodesk Meshmixer.
https://www.3dhubs.com/talk/thread/how-save-material-costs-tutorial-how-hollow-out-your-model
Essentially, import your .obj or .stl 3D model, Click "Edit" > Hollow. Adjust where the 'holes' are in the model, click the confirmation button in that menu and it automatically generates a second surface between the inside and outside of the model. For some types of 3D printing, this can drastically reduce the cost and time spent printing.

Custom Props, Toys and Action Figures by Blayne Design Sculpting Painting 3D Printing: Durable Handmade Items for Collectors and Film
Showing posts with label how_to. Show all posts
Showing posts with label how_to. Show all posts
Monday, September 26, 2016
Wednesday, April 27, 2016
3D Modeler Jay Kushwara – From Concept to Digital Model

Thursday, December 24, 2015
Fallout Vault-Tech Pebble Digital Watch Faces
2026 Update: All available links updated to the Internet Archive where possible:
 Back before the Pebble brand was purchased by Fitbit and Google (~2015) a friend gave me a first generation 'Pebble' smartwatch as a present. I loved the simplicity of the e-ink screen and designed a few a square-face version of the Fallout 'Vault-Tec' Industries' watch face for it.
My favorite watchface among those I put together is a revised version of 'Vault-tec 24' by Microbyte: I changed it to look better on a square original Pebble watchface, and to use 12-hour time measurements instead of the grainy/circular 24-hour one it had originally.
Vault-Tec 12 by Blayne: Download
How?: Using image editing software, as well as the Pebble Image Converter to properly dither image resources correctly while not looking too pixelated.
Then upload that .PNG image to the Watchface Generator v2 and add in/control the overall appearance. It lets you choose and adjust just about every conceivable detail.
Afterward, use a QR code reader App to easily open the URL on the phone which is paired to your Pebble watch. I made sure it opened in my default browser, so it could properly hand-off the URL to my Pebble iOS app. From there, as long as there's empty slots in you watch for watch faces, it then automatically transfers the new Watchface to the Pebble by Bluetooth.
Complicated to make, but fun to have.
Original 24h face:


Test shots of various faces on my Pebble + with my original GUESS wide-band leather watchstrap.
Wednesday, November 11, 2015
Restored Fallout 3 Original Watercolors
While browsing Fallout-related artwork, I came across an interesting IMGUR gallery, titled "My Collection of Fallout 3 Memorabilia - I was a producer on the game".
Among the various bits of Fallout themed ephemera are two of the original watercolors used for various promotional art, and in the game as representing old-world, pre-war bulletin board signs and propaganda. These two are by illustrator Natalia Smirnova.
Wanting to have copies of the non-weathered (i.e: in-game) imagery as a backdrop for my Fallout-themed figure work, I did some digital touchups and sizing to approximate the original in a printable size. Enjoy. :)


Redux:

Among the various bits of Fallout themed ephemera are two of the original watercolors used for various promotional art, and in the game as representing old-world, pre-war bulletin board signs and propaganda. These two are by illustrator Natalia Smirnova.
Wanting to have copies of the non-weathered (i.e: in-game) imagery as a backdrop for my Fallout-themed figure work, I did some digital touchups and sizing to approximate the original in a printable size. Enjoy. :)
Original:

Redux:

Original:


Wednesday, October 21, 2015
HOW TO: 3D Models for Printing (Cosplay)
I came across another great resource for free, user created 3D models with accessible downloads for end-user 3D printing:
"My MiniFactory": https://www.myminifactory.com/category/cosplay
I discovered it while looking around at alternatives for the Fallout 4 Pipboy. While there's some very great 1:1 scale items (perfect for cosplay), ytec3d's version(s) have many small pieces that don't scale very well if using for 1:12 custom figures that need a pipboy.
However, there are versions available for that use too, thanks to "Jim". :)
https://www.myminifactory.com/object/fallout-4-style-pipboy-mk-3-5-13032
"My MiniFactory": https://www.myminifactory.com/category/cosplay
I discovered it while looking around at alternatives for the Fallout 4 Pipboy. While there's some very great 1:1 scale items (perfect for cosplay), ytec3d's version(s) have many small pieces that don't scale very well if using for 1:12 custom figures that need a pipboy.
However, there are versions available for that use too, thanks to "Jim". :)
https://www.myminifactory.com/object/fallout-4-style-pipboy-mk-3-5-13032
Thursday, September 10, 2015
Tuesday, July 28, 2015
Friday, July 3, 2015
Thingverse - Opensource Action figures

While it's fun to see non-skeleton, Marvel Legends-esk style articulated 3D figures being made available, I feel it's even better to see open source versions made available on Thingverse.
Designer Jason Welsh released both a male and female articulated figure models for download, which might give some assistance to others designing future versions.
2026 Update: All links updated to the Internet Archive where possible. In the years since this post, T13 (or "Dummy 13" printable action figures have emerged as well:
https://www.printables.com/model/981111-dummy-13-version-10
Thingverse 3D models

There's some amazing collections of printable 3D models available on Thingverse. For example, what looks like a remodel (or perhaps the original 3d model?) used for an ALIEN film "Space Jockey" statue:

There's a variety of others saved in peoples themed "Collections" - well worth checking out if you want to do a small model-scale print on Shapeways, or a full sized one on a home 3D printer. The artist for this statue in particular, Geoffro has some amazing files available from a variety of SF genres.
Wednesday, May 6, 2015
HOW TO: Use a Vinyl Terminator 2 Endoskeleton cast to create a HQ replica

It covers many of the pitfalls he encountered during the design process, and features an astounding number of well cropped reference images from a variety of sources. Perfect if you're doing any Terminator-related art.
Particularly helpful is his recounting of the use of Alclad-II chrome lacquer paint:
After the gloss black base coat was fully dry (I gave it 24 hours), next up was the Alclad II chrome lacquer coat. I set the air compressor to approximately 15-20PSI and held the airbrush at around 10-15cm from the parts being sprayed. Application was the same as with the gloss black base coat; using a steady 'brushing' motion over the surface until I achieved the desired reflective finish.
[...] Alclad II chrome is a lacquer comprising of small metal particles. I found that it dries almost immediately upon application. I recommend a 'less is more' approach when applying Alclad II chrome - if you spray on too much it actually starts to dull. There is a 'sweet spot' to find when airbrushing the lacquer - immediately stop as soon as you achieve a nice reflective metal finish. NOTE: Alclad seems to brighten up even further after you have finished application - it actually happens before your eyes over the course of a few seconds. I believe this is caused by the metal particles in the lacquer slowly settling. Additionally, once fully dry (it doesn't take long at all) the chrome finish can be (gently) buffed up with a soft cloth (eg a glasses cloth) which wipes off the fine dust that tends to appear on the surface. You end up with a very reflective, metal-looking coating.
Start the process by reading his initial post here.
For a more resculpting-heavy design process, see SiO's Terminator Vinyl Endoskull build here.
Wednesday, February 25, 2015
HOW TO: Do Interesting Toy Photography - Makeshift Backdrops
A great article with examples on making interesting photo backdrops from household items:


via BattleGrip
Sunday, July 6, 2014
How To: create a hollow model for 3D printing
2026 Update: While Meshlab and Netfabb still have their uses, this method for hollowing out a 3D model is less relevant with more advanced modelling more widely available.
I've updated the historical links below using the Internet Archive for reference.
Printing a 3D model once it's "water tight" is great, but expensive: The material (and time) used to print a solid object is might greater than a hollow one with a connecting "spout" to the outside.
For this object - my original print was 22mm wide, but cost ~$10 via Shapeways.
I wanted to upscale the model to 28mm, but keep the cost from increasing drastically. With the small hollow area inside, the larger version only cost ~$11. Not a huge difference, but when printing multiple models, that space & print time can add up.

I've updated the historical links below using the Internet Archive for reference.
Printing a 3D model once it's "water tight" is great, but expensive: The material (and time) used to print a solid object is might greater than a hollow one with a connecting "spout" to the outside.
For this object - my original print was 22mm wide, but cost ~$10 via Shapeways.
I wanted to upscale the model to 28mm, but keep the cost from increasing drastically. With the small hollow area inside, the larger version only cost ~$11. Not a huge difference, but when printing multiple models, that space & print time can add up.
Using only free software (Meshlab and the free version of Netfabb), you can create hollowed out models for printing:
http://sites.google.com/site/3dprintfaq/workflows/hollowing-a-model
Via ZbrushCentral
It's also possible using Google Sketchup to create a simple object (a sphere, or custom drawn 3D object), then to 'flip' it's faces. This makes your inner surface. Drag / position this inside your 3D object (in the same workspace), and punch a hole in the polygons and draw a 'spout'; connecting the flipped inner shape to the surface of your main object.
Since Sketchup doesn't automatically turn spheres into polygonal objects, I had to draw the veracities for the 'spout' entrance directly on the sphere. Before, if I tried to delete the blocked area in Sketchup -- it would delete the whole inner sphere (because it was a solid object - not polygonal). This meant I needed to draw directly on the sphere with the line tool, then connect that to the outer shape.
Once that was finished, I exported the whole workspace (Sketchup .obj > to Meshlab .stl >) into Netfabb - and deleted the (now polygonal) area blocking the spout. It's a more labour intensive method than the automated Meshlab version - but necessary if the automated process won't work for your object.
2026 Update: See more updated methods online, or built into your SLA 3D printer's slicer software for hollowing models prior to printing. This, along with designing drainage holes in the prints themselves are vitally needed when printing using SLA (UV resin) to prevent islands of uncured resin from forming.
Thursday, January 23, 2014
Toy Documentaries
__scaled_600.jpg)
Seeing interviews with fellow fans and the designers of beloved toy lines really reminds me of that same magic I felt as a kid. For many people, childhood toys connected you to a universe beyond yourself. As an adult (and one who makes toys), learning more about what went into the creation of those toys captures some of that magic again.

My favourite quote from a toy documentary thus far comes from "Princely Toys", an interesting 1970s BBC documentary about a collection of clockwork automata:
"Happily the real does not forbid existence to the unreal. These individuals are fragments of the imagination, and reflected the age to which they were born."
Toys, as much as any other form of culture, are reflections of a particular era. The influence of these products I believe have a greater, lasting influence on those that consume these items. Learning about that creation process is fascinating to me, so I'm always interested by toy documentaries. It's unfortunate that so many fly under the radar. Below is a listing (full length when available) of the various toy documentaries I've found online.
"The Secret Story of Toys"
The Secret Story of TOYS from Anthony Ladesich on Vimeo.
This is my favorite toy documentary so far. While it's fairly short, it features some of the artists responsible for NECA's Sci-Fi movie sculpts discussing their craft. I would love to see a full length documentary on the topic one day.
For more information about the artists and processes used by the NECA artists, Figures.com had an article with 150+ pictures from their NECA Studios tour.
"Paul Harding: Wax Master"
TBB TV SEASON 1 / EPISODE 2: PAUL HARDING on Vimeo.
Interviews with sculptor Paul Harding.
"Princely Toys" [via Dangerousminds.net]
An interesting documentary from 1970s BBC, complete with radiophonic workshop-era analog synthesizer and often poetic musings about the subject of clockwork toys and automata.
"Toy Masters"
This is a documentary about the genesis of Mattel's "He-Man" franchise. However, it's YouTube channel is blank, and it's difficult to track down what happened to the full documentary, which apparently saw release in 2012. While researching, I came across a posting at Battlegrip.com asking the same questions.
I did come across an interview with the documentary creators linked from their Twitter account that is worth reading over. Apparently the documentary is finished, but still pending release.
Another documentary (a pair of videos with a few interviews) is available on YouTube called "The Secret Origins of He-Man and The Masters of the Universe". I'm uncertain if this is/was connected to "Toy Masters", but it covers a similar subject matter - interviews with Mattel employees about the creation of their 1980s toyline.
"The Secret Origins of He-Man and The Masters of the Universe"
Part 1:
Part 2:
"Plastic Galaxy: The Story of Star Wars Toys"
Plastic Galaxy: The Story of Star Wars Toys SNEAK PEEK TEASER FOOTAGE! from Plastic Galaxy on Vimeo.
I first came across this preview via Battlegrip.com. Plastic Galaxy looks to be an amazing mix of curated interviews with fans and creators about the creation and phenomenon of Star Wars toys in the late 1970s and 1980s.
"ToyLand"
Journeying further back from the 1980s, there's an interesting documentary called "Toyland" which interviews many of the (now elderly) designers of the Slinky, Twister, Operation, etc, while covering the modern process of pitching new games/toys to toy companies.
* * *
Continued Reading:
More information and photos of various toy prototypes can be viewed at "Behind the Toys", such as this neat forum post about the various 1990s Kenner/Galoob 'Aliens' figures.
Another resource for photograph of Kenner-era Star Wars wax sculpts and prototypes is The Star Wars Archive Database (source of the Hoth Leia photo used earlier in this post).
There's also an excellent posting found here that indexes a variety of articles and tutorials on toy sculpting and prototyping.
Monday, December 16, 2013
HOW TO: Painting Miniature Eyes, Faces and Skin Tones by Andrea Miniatures
Here's a great skin tone painting tutorial that's applicable to custom figures.
While most 'comic book' style characters don't have as many gradient
steps, some custom figures (particular NECA-style, or realistic
depictions of people) benefit from this approach. I this approach (although not the same colors) when painting the face/beard on my Hellblazer: Constantine figure
(Simon Bisley styled version).
I've also edited together two infographics for easy reference from video screencaps:


A course by Andrea Miniatures, this is a tutorial of how to paint eyes and layer the skin tones on a miniature. This also includes the 5 O'clock beard effect that brings out the realism.
I've also edited together two infographics for easy reference from video screencaps:


Sunday, November 10, 2013
How to: Strip paint from miniatures / custom figures

While rummaging around in a box of 1/2 done projects from a few years back, I came across one that needed paint stripping. It was an early example a paint test where I was experimenting how different brands of paint react to one another. From that initial test, it taught me why there's an order to paint use:lacquer paint must be applied first, fully cured - followed by any acrylic paint or washes.
For stripping paint, I came across a recommendation from the tabletop gaming community: using Castrol 'Super Clean': a biodegradable cleaner that works better than 'Green Cleaner' at removing paint from old miniatures (either plastic or metal).
I'll track some down this week, and give this tutorial a test using a partially painted Mattel DC Universe figure. I'm curious to see if it removes only the paint, or also attacks the superglue/sculpting compound as well.
Update: This product worked well for stripping acrylic (Vallejo/Citadel) paint. At least in Canada, it can be found at Canadian Tire in the automotive/tire area. It's since dropped the "Castrol" brand, but the automotive parts desk directed me to the product quickly. It was a bit confusing, as it wasn't shelved alongside floor/household cleaners.
2026 Update: It appears the brand continued to evolve into "Mean Green", as that's what's carried in it's place here in Canada these days.
I bought a small rubbermaid bin for the purposes of soaking figures in, and left an old project of mine in it for a day. All acrylic, non-factory paint was loosened after a day left soaking in SuperClean, and was easily removed with an old toothbrush under warm water. I tested it and left the (cleaned) version in the same tub soaking for an additional 8 hours. However, no further paint (factory paint) was loosened.
It's useful to note that paint that was sealed underneath old superglue remained, as this product doesn't dissolve cyanoacrylic glues, or Aves Apoxie Sculpt. While I haven't tested it against Kneadite/ Citadel's "Green stuff" sculpting compound, I've read online that it will detach/dissolve this compound along with acrylic paint.
Update: This product worked well for stripping acrylic (Vallejo/Citadel) paint. At least in Canada, it can be found at Canadian Tire in the automotive/tire area. It's since dropped the "Castrol" brand, but the automotive parts desk directed me to the product quickly. It was a bit confusing, as it wasn't shelved alongside floor/household cleaners.
2026 Update: It appears the brand continued to evolve into "Mean Green", as that's what's carried in it's place here in Canada these days.
I bought a small rubbermaid bin for the purposes of soaking figures in, and left an old project of mine in it for a day. All acrylic, non-factory paint was loosened after a day left soaking in SuperClean, and was easily removed with an old toothbrush under warm water. I tested it and left the (cleaned) version in the same tub soaking for an additional 8 hours. However, no further paint (factory paint) was loosened.
It's useful to note that paint that was sealed underneath old superglue remained, as this product doesn't dissolve cyanoacrylic glues, or Aves Apoxie Sculpt. While I haven't tested it against Kneadite/ Citadel's "Green stuff" sculpting compound, I've read online that it will detach/dissolve this compound along with acrylic paint.
Friday, May 31, 2013
How To: A look inside NECA studios

For many years, NECA was the only western toy company that produced consistently high quality figures at a reasonable retail price. For my own custom figure projects, it was a combination of the franchises NECA worked with and the quality of their PVC and articulation joint engineering that stood out. For almost a decade before retail price creep took over, NECA converted me to working almost exclusively with their figures as composite bases to work with.
Figures.com had a great look inside NECA's studio, including some upcoming (circa 2013!) projects:
http://www.figures.com/forums/news/30712-exclusive-neca-studio-tour-part-two.html
2026 update: Link updated to The Internet Archive.
Monday, April 22, 2013
Thursday, March 7, 2013
How To: Work with Kneadite ('Green Stuff') sculpting material
I recieved a comment on my Hellblazer John Constantine custom over at TFW2005 recently:
Dude, Blayne!I think this is the best thing I've seen from you, bro!That is killer work! I purchased the Citadel Green Stuff but have no idea how to use it without wasting it. Lol! I mean I bought the whole sculpting tool kit too. So, is the head on John here completely sculpted from scratch or is it just the hair resculpted on top of the other head?
I decided to do cross-post some explanation about Greenstuff/Kneadite here, as it pretty different to work with compared to Aves Apoxie sculpt.

For this Hellblazer John Constantine custom, I dremmeled down the original hair and part of the face. With some initial Aves Apoxie Sculpt work and blended edges I filled out the cheekbones and scar then went to work on the hair using Kneadite, aka "Green Stuff".
Citadel's 2-part polymer sculpting compound comes by the spool, and has a slight flexibility to it you can't achieve from firmer compounds. I buy mine in a spool on eBay under "Kneadite", as it's the same thing as the official 'Citadel' brand you'd find at at Warhammer shops at a cheaper price point.
To properly use Kneadite, there's some things you should keep in mind:
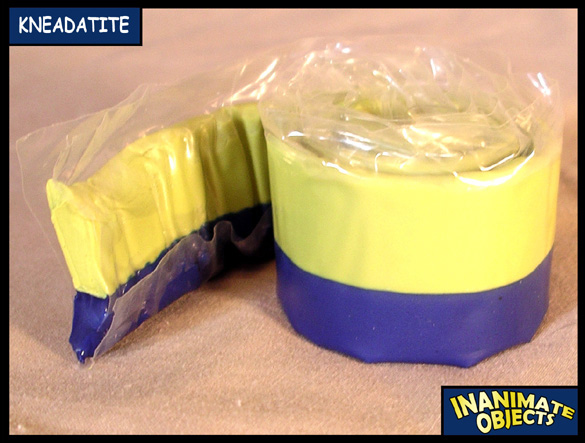
Press/fold/press/fold the 2 pieces together until it's a uniform green color with no swirls. From there, it'll be really sticky for a few min. Add sections to whatever you're sculpting, bit by bit. When sculpting detail, get the rough shape you need, then wait a few minutes for the material to firm up, allowing it to keep detail better, and stick less to your sculpting tools.
For all my sculpting, I use a hobby knife (with Excel #11 disposable blades) + silicone 'clay shapers' + some water to sculpt. Some people use saliva, but that's... well, 'personal preference'. I keep a waterbottle nearby with an upturned cap. I've heard of some people using stamp water-wheels to wet their fingers just enough to smooth the sculpt. Be careful about adding new pieces on top of where you've applied water - it won't stick with that water in between.
Unlike Aves Sculpt, Kneadite doesn't really stick well to it's self once it's started to firm up. It will, but there will always be a seam line (and a slight weakness if stressed along that seam), unless that piece was added while it was still in it's 'sticky' phase.
Try to work in manageable sections. I did the Hellblazer custom's hair in Kneadite during 3 short sessions over 3 days. I leave things to cure for a full day, just to ensure things aren't damaged/shift when trying to sculpt over something that's 90% cured. When sculpting with Kneadite - add what you need, and focus on a specific area. If you're sculpting the hair on your custom figure's head, consider only sculpting the bangs, and the next day (or a few hours later) sculpting the next section. However, if the sculpt is layered (many small bits of hair, etc.), consider sculpting the entire overall shape at once, then going back and adding detail pieces after things have cured.
Kneadite is very rubbery to sculpt with, making it ideal for hair, faces, and other things. It doesn't blend, so avoid trying to smooth it off to blend/feather into another surface - it won't work. Avoid trying to sand Kneadite down to a feathered edge to achieve a blend to the base figure - that's best kept for products like Aves Apoxie Sculpt. Kneadite will actually peel/fall off if it's too thin.
You can actually use this to your advantage. For example, I sculpted claw-like nails on a ninja turtle figure using Kneadite - they cured, and popped right off with a bit of pressure (due to the type of plastic Playmates uses to make their new TMNT figures). I put a drop of gel-type superglue on the finger, and replaced the cured kneadite fingernail. Rock-solid now.
Kneadite (Cons):
- Kneadite can pick up fingerprints easily - be sure to smooth these out before the material cures to far.
- Kneadite doesn't sand well. It's similar to trying to sand soft 'cape' plastic. It's possible, but the surface afterward is rough and 'pilly'. Try to achieve your final surface on your last layer.
- Kneadite can't smooth/blend well into anything. This goes hand in hand with not being a good material to be sanded. Make sure your sculpted section has clearly definined edges to to this into a benefit.
- Kneadite doesn't cure well to it's self in multiple stage sculpting. It's best to sculpt a defined area all at once.
- Kneadite has a small cured section between the unmixed Yellow/Blue A/B parts. Always cut this away to avoid hard pieces surfacing as you sculpt.
Kneadite (Pros):
- Flexible! This is the closest sculpting material to flexible plastic I've ever used. While Aves Sculpt can sand well (unlike Kneadite) - Kneadite has a flexible 'give' to it that Aves and other sculpting compounds lack. In small areas prone to bumping) tips of hair, nose, hands, boots, accessories, thin sections that overhang), Kneadite has some flexability. The same areas if dropped, or bumped when sculpted with Aves (rock hard) will actually chip, or snap. This is why Aves is excellent for overall construction on the main body of a figure, or for gap-filling, while Kneadite is good to sculpt defined details on top of a figure.
- Kneadite can cut/trim easily. As long as you have an ultra-sharp blade (#11's work great), 'whittling' down your sculpt in some areas (for hair, edge cleanup/trimming, or for adding battle damage, usually) works well vs. the rock-hardness of cured Aves.
- It's initial rubbery firmness creates realistic clothing/wrinkle/bunching up/ effects faster than Aves.
- When Aves has a tiny bit of water added to it's surface (during sculpting), it actually becomes very soft / 'gooshy', or and paste-like if too much liquid is added. However, Kneadite won't absorb the water - adding some just helps ensure a smooth surface.
Wednesday, December 26, 2012
A new take on "Fruticus"/"Dudicus": Brawl as a Backpack!


As an adult, I've made sure to pick up the modern versions of each combiner, one which "Bruticus" is a favorite. The commercial for the 2nd generation of toys ("G2"), Bruticus is one I actually remember watching on TV as a kid.
Watcing this ad again, I'm reminded of how popular the Beastie Boys were back then. ;)
When the Transformers: Fall of Cybertron game came out, Hasbro released a new series of Transformers through their 'Generations' line that had non-earth based vehicle modes - including a new Bruticus (Left). This was suppose to be modeled on the in-game look of Bruticus (Right):


While I still prefer the streamlined look of a modified TF: Energon Bruticus mold, thanks to FansProject's add-on set, (seen above next to my MakeToys 'Green Giant'/ Devastator), I still thought I could create something out of the lanky version.
When BBTS posted their shared exclusive "G2" Bruticus, it caught my interest. Most of "Generation 2" Transformers were re-releases of older '80s bots, recast in neon or pastel colors - in the case of G2 Bruticus, the new release even mimicked the neon-camo scheme of the original figure.
When I opened the figure today, I decided to do some modification - but not customization.


I got another Helicopter ("Vortex") from the retail line (different colors), allowing Bruticus to have double-helicopter arms - by far the more balanced look than that strange 'space shuttle' for an arm. The shuttle was switched to be a leg/foot, and the tank ("Brawl") was used as a backpack.


The overall effect mimics the smokestack/double-canon the original figure had, and avoids the ugly hollow gun included by Hasbro that plugged (loosely) into the back of the figure. Having the tank connect to the torso robot's "tiny arms" ("Onslaught's") with the help of the dual-5mm posts sticking out of the helicopter's sword-accessories allows this modification to be possible. Having the tank as a backpack adds some bulk to the (hollow) torso, and helps with the figure's balance too.

I realize this sort of thing would be mundane to the extreme for most people - but I'm not most people. :)
Until now, I've not come across anything close to this "alternate" transformation at TFW2005's forums, or elsewhere. Hopefully it helps other Transformer fans to change their existing figure - one that otherwise might look less than stellar without some modification.
Sunday, December 16, 2012
How To: Gunpla Paint Reference Guide
While researching swatches for Tamiya sprays online, I came across this resources:
The Layman's Gunpla Guide - Paint Reference


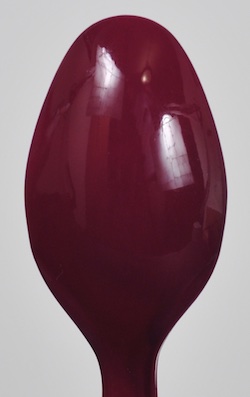
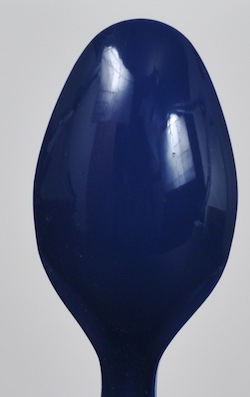
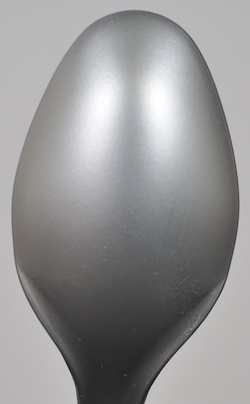
It's a great resource to see what a different company's spray paints look like when dried, particularly when most online retailers just use a generic stock image to represent all colors.
The Layman's Gunpla Guide - Paint Reference
Subscribe to:
Posts (Atom)